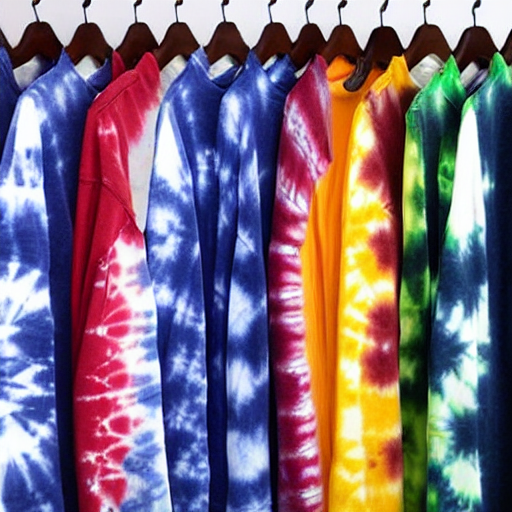
If you’re looking for a fun and creative way to spend your summer days, look no further than tie-dye! This age-old art form is a great way to express your creativity, and it’s surprisingly easy to learn. In this blog post, we will provide a comprehensive guide on how to tie dye. We’ll cover everything from the basics of tie-dyeing to more advanced techniques. Plus, we’ll give you tips on how to get the best results with a minimal effort tie dye method. Are you ready to get started?
Choosing your fabric
The first step in tie-dyeing is to choose your fabric. You can tie-dye almost any type of natural fabric, including cotton, linen, and wool. Synthetic materials like polyester and nylon will also work, but the results may not be as vibrant. Once you’ve chosen your fabric, it’s time to prepare it for dyeing.
Which type of dye should I use?
Two main types of dye can be used for tie-dyeing: powder and liquid. Powder dyes are less messy and easier to clean up, but they can be more challenging to work with. Liquid dyes are messier, but they’re also easier to apply evenly to your fabric.
These dyes are specifically designed for use on natural fibres and produce the brightest and most vibrant results. You can find these dyes at most craft stores.
Other useful supplies
In addition to your fabric and dye, you’ll also need a few other supplies. These include:
- Rubber bands
- A plastic bucket or container
- A pair of rubber gloves
- Old clothes that you don’t mind getting dirty
- Large plastic bag
Preparing your fabric
Before you can start tie-dyeing, you need to prepare your fabric. This step is vital because it will help the dye adhere to the material and produce vibrant results. To prepare your fabric, soak it in a solution of warm water and textile detergent for 20 minutes. Then, rinse it in warm water and let it air dry.
Tie-dyeing your fabric
Now that your fabric is ready, it’s time to start tie-dyeing! You can use a few different methods, including the traditional spiral method, crumple method, and kaleidoscope method. We’ll walk you through each of these methods so you can choose the one that’s right for you.

Spiral Tie Dye Method – Beginners
The spiral method is the most classic tie-dye technique and is also the easiest to learn.
- Start by folding your fabric in half and then in half again.
- Use a rubber band or string to tie a tight knot in the centre of the fabric.
- Start wrapping the fabric around itself, starting from the centre and working your way out. Keep the material tight as you wrap it to form a spiral shape.
- Once you’ve wrapped the entire piece of fabric, tie another rubber band or string around it to secure the shape.
- Now, it’s time to add the dye. To do this, fill a bucket or basin with warm water and add your desired dye colour.
- Submerge your fabric in the dye and let it soak for 20-30 minutes.
- Remove the fabric from the dye and rinse it in cold water until the water runs clear.
- Once your fabric is rinsed, untie the rubber bands or strings and let it air dry.
Crumple Tie Dye Method – Intermediate
The crumple method is an excellent way to tie-dye if you’re looking for something a bit more advanced than the spiral method, but still relatively easy to learn.
- Crumple your fabric into a tight ball*.
- Use rubber bands or string to secure the material in several places.
- Soak it in a dye bath for 30 minutes.
- Rinse the fabric and remove the rubber bands or string.
- Gently unfold the fabric and lay it flat to dry.
*You can also crumple your fabric into a shape other than a ball. For example, try folding it into a triangle or rectangle for exciting results. Just be sure to secure it tightly with rubber bands or string, so the dye doesn’t bleed through.
Kaleidoscope Tie Dye Method – Advanced
The kaleidoscope method is the most advanced of the three tie-dye techniques mentioned here. It’s perfect for those who are looking for a challenge and want to create unique and intricate designs.
- Fold your fabric into a triangle, then fold it into a smaller one.
- Tie a rubber band around the material about an inch from the point.
- Repeat this step until you have as many rubber bands as you want colours.
- Dye each section a different colour, then let it dry completely.
- To create the kaleidoscope effect, twist the fabric tightly and secure it with another rubber band.
- Let it sit for a few hours, then rinse it out and enjoy your new tie-dye creation!
These are just a few of the many different ways you can tie dye. So have fun experimenting and see what works best for you! With a bit of practice, you’ll be a tie-dyeing pro in no time.
I’d love to hear about your tie-dyeing experiences! Get in touch and let me know how it went. Happy dyeing!


